Hudson’s Bay Company Pole End
At the
These instructions are supposed to be used as an alternative to the ones described at http://www.brockeng.com/AmusingRaven/pole.htm.
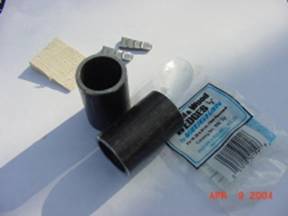
Parts List
|
|
|
|
|
|
1 |
1-1/4” dia x 12 ft long Home Depot closet rod |
|
|
|
2 |
1” x 2” long Sched 40 black pipe |
1” Sched 40 pipe is about 1-3/16”
outside diameter and a little over an inch inside. |
|
|
2 |
Axe head wedge kit |
|
Fabrication
|
|
|
|
|
1 |
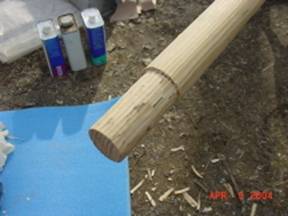
Cut pipe sections to length, deburr, and chamfer ends, inside and out. |
|
|
2 |
Turn or whittle pole ends to slip fit for pipe internal diameter. Cut a sharp shoulder for the pipe section to bed against. |
|
|
3 |
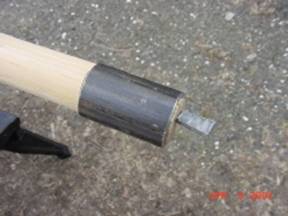
Notch the pole ends for the wood wedge |
|
|
4 |
Drive on pipe section, drive in wood wedge, cut wood wedge flush. |
|
|
5 |
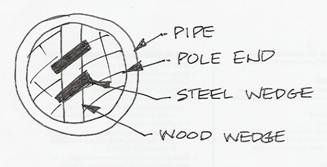
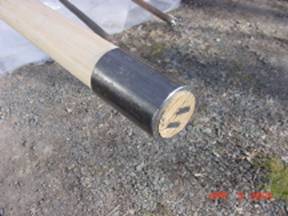
Drive in steel wedges. Place them in the pattern as shown. |
|
|
6 |
Admire the result |
|
Return to the instructions at http://www.brockeng.com/AmusingRaven/pole.htm for marking and finishing the pole.
On the River
Functionally, this pole end detail seems to perform its
basic function of protecting and stabilizing the pole end, but on the rocky rivers
around here (western
The performance could be improved by using a hanger bolt or a lag bolt in place of the steel wedges, but the assembly would offer no particular advantage over the one that uses the copper pipe cap.
Conclusion
I carry this pole around and use it, partly as an exercise in historical authenticity and partly in search of stream conditions where it’ll work better. I can’t really recommend it for general use, though.
Copyright Fred Klingener, 2004
May be reproduced with this notice for non-commercial use